Regina
I went through my bead stash and pulled out a strand of very high quality garnets. I calculated that I had just enough for a triple strand bracelet. I then grabbed my sketch pad and drew a few ideas for the clasp. In my opinion, the toggle clasp is the easiest for one-handed opening and closing, as well as the most secure. I don’t like to repeat design shapes; so I decided on a triangle with a curved side. Below is the sketch with the drafted pattern and a mock-up of a single strand of beads.

I have a bit of calculating to do — how tall should the hollow form be? And what should the gauge of the sheet metal be (in other words, the thickness of the metal) for the walls of the hollow form? I looked at some of my sheet metal stock and decided on 22 gauge sheet metal. I also made the decision that the hollow form would be approximately 1/4 inch tall, or at least, I’d start with that dimension knowing that the final piece would be somewhat less than that. (There’s a lot of trimming, so to speak, that happens when ensuring the pieces fit exactly together.) And then I needed to think about the process — what’s the first step in fabricating the hollow form? I decided that the inner shape was the first. Below is a picture of my figurings and the beginnings of the first shape.

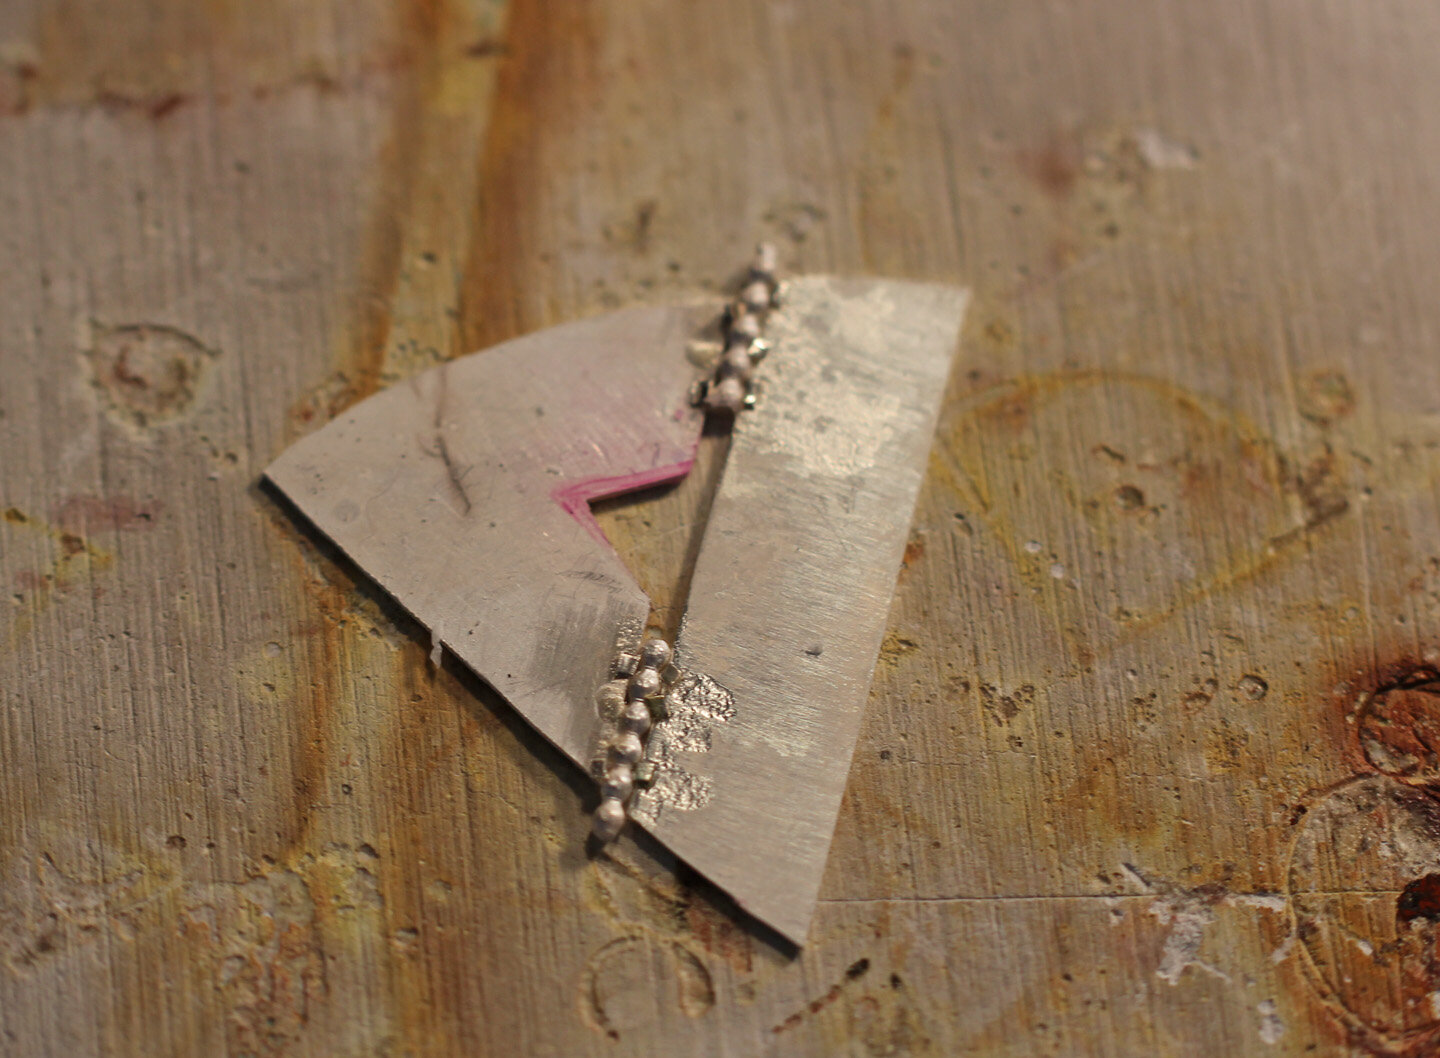
I finished the inner triangle shape and then concentrated on the top of the hollow form. There needs to be four pieces to the top: two pieces of sheet metal and two pieces of beaded wire. These four pieces will be soldered together to form one piece and will be shaped so that it will not only fit the inner and outer “triangles” but also have some selvage so that I can true up all the edges. The picture below shows the top of the hollow form after soldering the four pieces together.
After I clean up the solder mess along the joins of the top of the hollow form, I will solder the inner triangle to the top. I will clean up the inner edges and then this piece is ready for the next two pieces. I form the outer triangle and solder it closed. After cleaning up the join of the outer triangle, I solder it to the hollow form. Below is a picture of the hollow form in process after I’ve soldered the outer triangle to the top of the hollow form. You’ll also see the sheet metal I’ve prepared for the bottom of the form.

I’m going to include a picture here of the soldering of the bottom to the rest of the form. I do so to highlight a couple of things. First, it’s amazing to me, still, that jewelry that will be quite stunning in its final form can be so ugly when being worked up. The second is to illustrate how much attention to every detail must be given to a piece. There are two holes in the bottom piece of the form: one that will have the opening for the form, and another so that air can escape the closed form when soldering. Without that extra hole, the air would expand and place pressure on the form, and cause it to explode, a potentially dangerous outcome. Here’s the picture.

After each soldering task, the piece must be pickled — yes, that’s a real jewelry term. The piece is placed in a warm, mild acid bath (the pickle) in order to remove the effects of heating. In the case above, you see the discoloration from the flux (the blue colored stuff), the oxidation from the heating (the grey colored areas), and the burned residue of the solution I use to prevent previously soldered areas from unsoldering (the dark brown areas). Once the piece is pickled, I get to work cleaning up the hollow form. I trim the selvage from the bottom, file and sand the edges, and begin the work of sanding the top, bottom and sides of the form. At this point, too, I will note where I have fire scale and begin to remove it. Ah, fire scale, the bane of silversmiths everywhere, is defined as the “stain that appears on the surface of silver after it has been heated” (quote from the Internet). Once I’ve done all that, I can attach the connections I’ll need for the beads. Below is a picture of the hollow form undergoing a soldering task for those connections.

Each of the half circle connections for the hollow form I’ve made myself. Years ago before I had my own workshop, I paid for time in a workshop of a former colleague and so other people could see my methods. I took a lot of ribbing for my obsessiveness in that I had to make my own components, but I still think that to achieve the exact look I am aiming for, I have to make my own components even when perfectly good commercially available parts are suitable. I will turn on the comments to this blog and readers can weigh in.
I’ve completed the fabrication of the hollow form. The clasp demands several pieces more, and for the bracelet, I will make two keepers. I started with the rest of the clasp. I will make the bar that goes through the opening and closes the bracelet on the wrist. For the bar, I use two 4mm garnet beads, a piece of round wire, and my signature connection. Below is a picture of all the elements for the bar.

Here I must admit I used commercially available, fine silver bezel cups (the settings) for the garnets. At this point in my practice, for stones that are 5mm and smaller in diameter, I will not make them myself. In years past, it was not possible to buy fine silver bezel cups, and my fingers were younger and more agile. But now…. I anticipate a question about the use of fine silver (99.9% silver as opposed to sterling which is 92.5% silver). Stones are held in the bezel because the wall of the bezel is moved against the stone, and so the stone is trapped in the setting. No glue is used unless there is an unusual condition that requires it. Fine silver is much softer and more plastic than sterling, and so moving the fine silver against the stone is easier. I will shape the beaded wire element I’ve made and then solder it to the bar. Oh, and the bar needs straightening. Here’s a picture of the soldering task for the bar.

In a lot of these pictures, you see the use of soldering tweezers to hold the pieces during the soldering process. A lot of jewelry-making involves problem-solving: how am I going to hold these pieces so that I can solder them successfully? During my tenure as the open jewelry studio “monitor” at an art center in New Jersey, I helped out a lot of beginning and intermediate students with soldering issues: how much solder to use, how do I position my pieces so that they will solder. I hazard to say that learning to solder well takes a lot of practice and time as well as the patience to endure frustration and mistakes. I’ve had my share of experiences with melting a work-in-progress and/or with a lot of what I call solder mess.
Finally there are four tasks ahead: the rest of the pieces for the bar and the two keepers. Below is a picture of the completes pieces.

In the middle of the picture above is the piece that connects the bar with the beads. You can just make out the drawing of the bar with marks for the placement of the rings. The chain I made from jump rings that, once soldered, I can shape them into ovals. On the sides are the keepers, pieces that when strung with the beads will keep all the strands together. Generally, I tumble these pieces so that they will get burnished which is a wonderful finish. When all the pieces are polished and the bracelet is ready to be assembled, I begin by knotting the beads together with the keepers. The picture below shows that work in process.

I used crimson silk for the knotting. I tend to knot very tightly; over time, the silk will stretch. It is my intention that it should take years, possibly more than 20 years, before the silk will have stretched so much that the bracelet will require re-stringing. This is a statement piece and one that I think the film stars of the 40s would have loved to wear. I hope you agree.
