Greer: Earrings to Complement Necklace
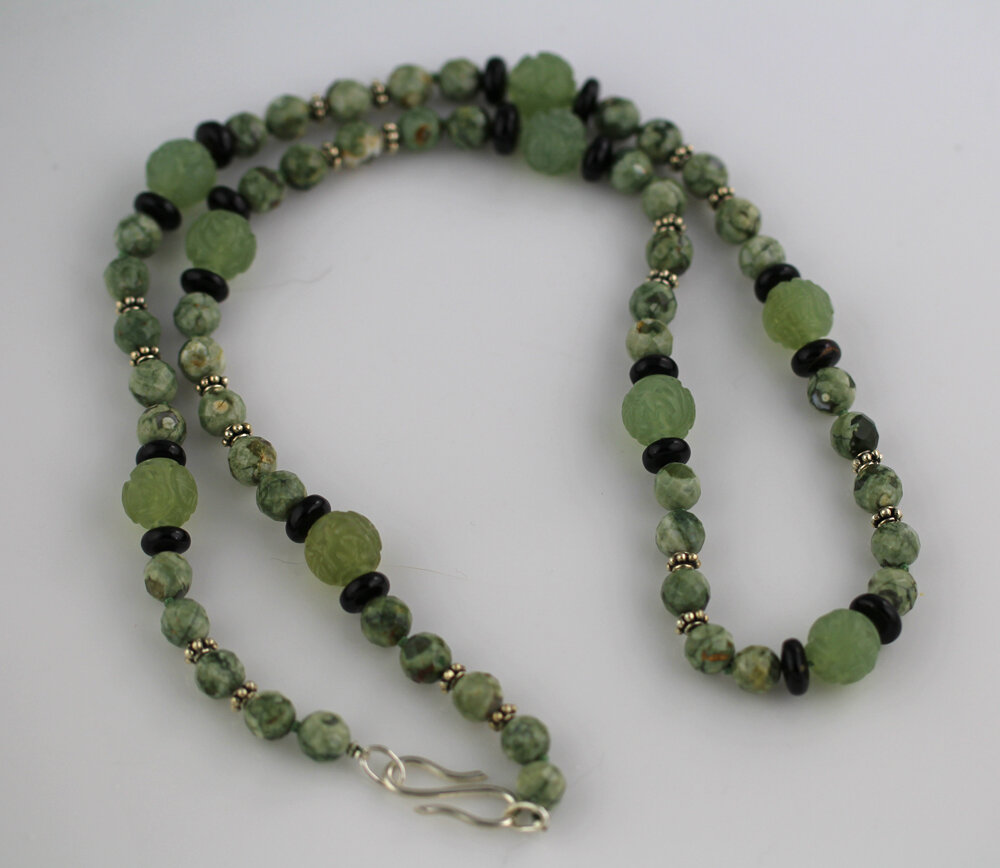
I made the below necklace quite a while ago; the necklace is composed of carved jade and Nevada jade beads, black coral rondelles and Bali spacers. I acknowledge that simple black onyx stud earrings would be suitable, but I love a challenge. And so I decided to make a pair of earrings to complement this necklace, and these earrings would be large and noticeable. I figured they’d be a domed hollow form, like a lentil split in half.
I was not going to find either the jade or the Nevada jade in cabochon form to use to make the earrings, so I had to go with another material. I went through my stash of stones and selected round green onyx cabochons. Next step is to make the bezels (settings) for the stones. I do this because the silver will add some dimension and when I design on paper, I need the exact dimension of the stone and setting. By the way, I use fine silver for the bezels because fine silver is softer than sterling, and it will be easier to move the fine silver around the stone. It is the bezel that holds the stone — there is no glue.
I then sketch some ideas for the earrings. And out of these ideas, I select one. The one I happened to choose for this earring necessitated drafting of a pattern that I will use to create the earrings. See the photo below.
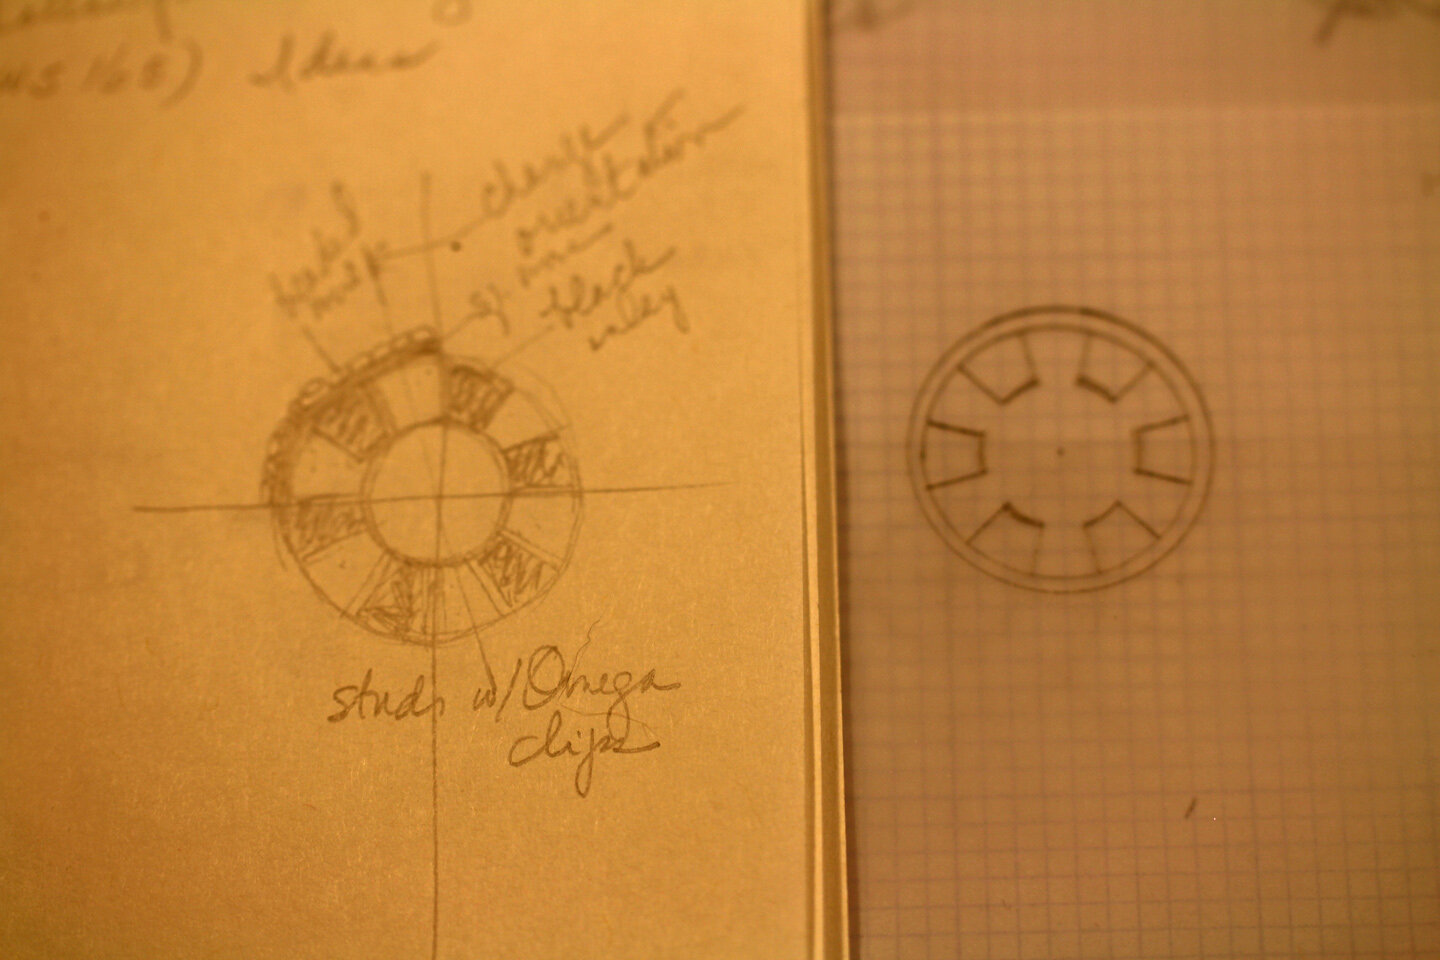
Once I have the pattern drafted for the top of the earrings (the image to the right above), I could proceed. From experience, I knew that doming the metal would cause a loss of “real estate,” so to speak, meaning that the earrings would be smaller than the pattern on the paper. I did make a copper prototype which you’ll see later in this blog since it did double duty for me. I redid the pattern adjusting the diameter, making the pattern just a bit bigger. Now that I had the pattern, I cut out the spaces in the sterling silver. When all six of the openings are cut out, I true up the edges by filing but I do leave “selvage” on the edge of the pieces. I then solder the tops to bottom pieces of silver. See the picture below for the work in progress.

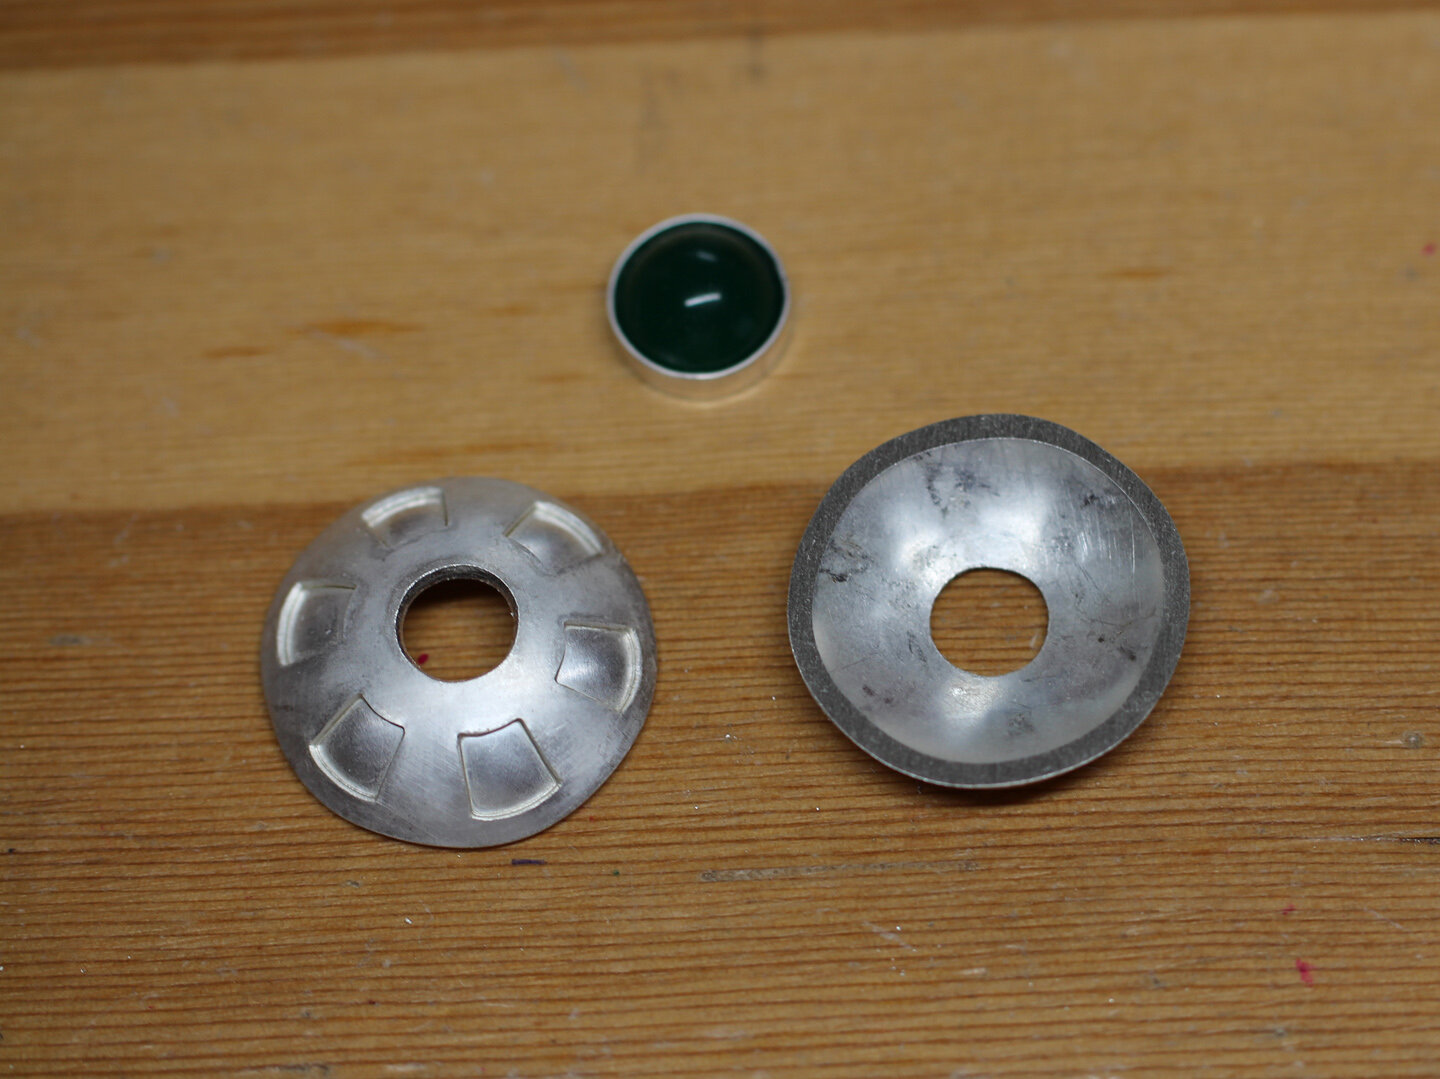
The piece on the right is two steps behind the piece on the left. After soldering, I inspect the soldering job to ensure the soldering is complete (don’t want to have the same issue as I did with Claire). Then I cut off the selvage around the earrings, and I cut out the middle, mainly to lighten the earrings a bit. After the two are trued up, I dome them. I did not want these earrings to be flat, but rounded.
I use a stake and Delrin (plastic) hammer to dome these pieces (see the picture above). I then sand the bottoms so that they will lay perfectly flat. On the other side, I sand the tops so that the surface of the domes will all be in the same spherical surface — the hammering makes the surface uneven. When I go to polish these and I haven’t smoothed out the domes, I will not get a good polishing job. It’s hard to see in the sketch (the first image of this post) but there are two embellishments to the edges of these earrings. The first is a piece of square wire followed by a piece of beaded wire. In the picture below, you will see the work-in-progress.
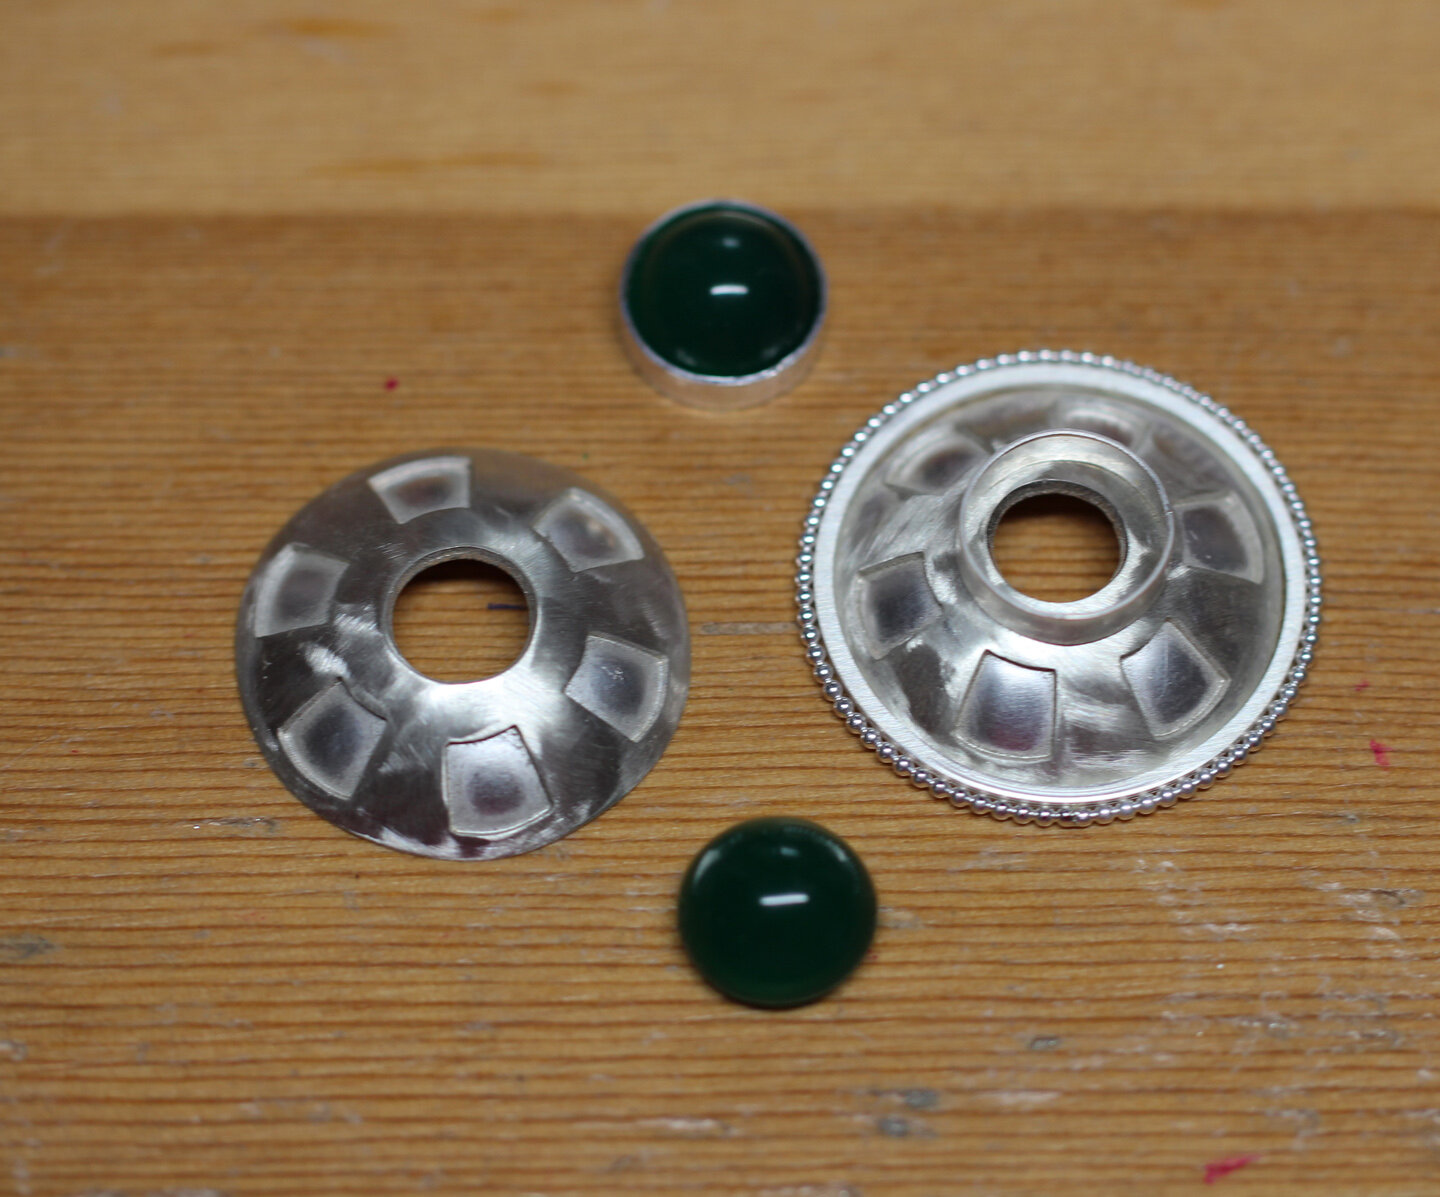
The circle of square wire has to fit the edge of the earring perfectly; that may take several solderings (of the wire into a circle) until this piece is exactly right. Then I do the same with the beaded wire. Once they fit together perfectly, I can move onto the next step. The photo above shows the earring to the right with the two wire embellishments placed (but not soldered) to the edge; additionally I have already soldered the bezel to the dome. In the image below this text, you can see that I have soldered the tops of the earrings to bottom pieces of silver, thus creating what we jewelers call hollow forms.

In the above image, not only do you see the hollow forms nearly complete, but you also see the components I will be using for the backs of the earrings. These earrings cry out for special treatment in the way they will secure to the ears because they will be larger and somewhat heavier than other stud earrings. In addition to the posts, you see Omega clips and domed circles, one with a slight hole. Omega clips work best when the ear is held between the clip and the domed circle; without that domed circle, the Omega clip will not hold the ear as well. I learned this when I apprenticed in a fine jewelry atelier. The reason for the hole in the domed component is: when I solder the domed component to the back of the earring, the air will expand and potentially cause the domed component to fly into the air. Really. In addition, I will solder the post right up against that hole.

The Omega clips are composed of three components and together they are like a spring mechanism. There’s the piece that attaches to the back of the earring (see the photo above where I’m soldering that piece to the back of an earring), the curved piece that holds the ear lobe, and the tiny wire that keeps the other two components together. I take apart the Omega clips because the heat from the soldering process will soften the wire so that it will not act like a spring. In the photo above, I have already soldered the dome in place, and using what’s called a third hand, I will be soldering the Omega clip component to the back of the earring. I cannot hold the soldering torch in one hand and the Omega clip component in the other hand hence the necessity for the third hand. The yellow in the photo is yellow ochre, a powder used by potters to make a glaze. Here it acts as a retardant by making the previously soldered dome and beaded wire “dirty” so that they will not re-solder and potentially move.
Six solderings were required to complete the backs of these earrings. When I accomplished these tasks, I cleaned up the backs of the earrings, sanded both the fronts and the backs, and then did an initial polish. I then set the stones, getting ready to inlay them. Here’s where the copper prototype came in. Even though I was using a black material for the inlay, I was concerned that the polishing of the tops of the earrings would be such that the silver would come through the black inlay. And I didn’t want that. Look at the copper prototype below.
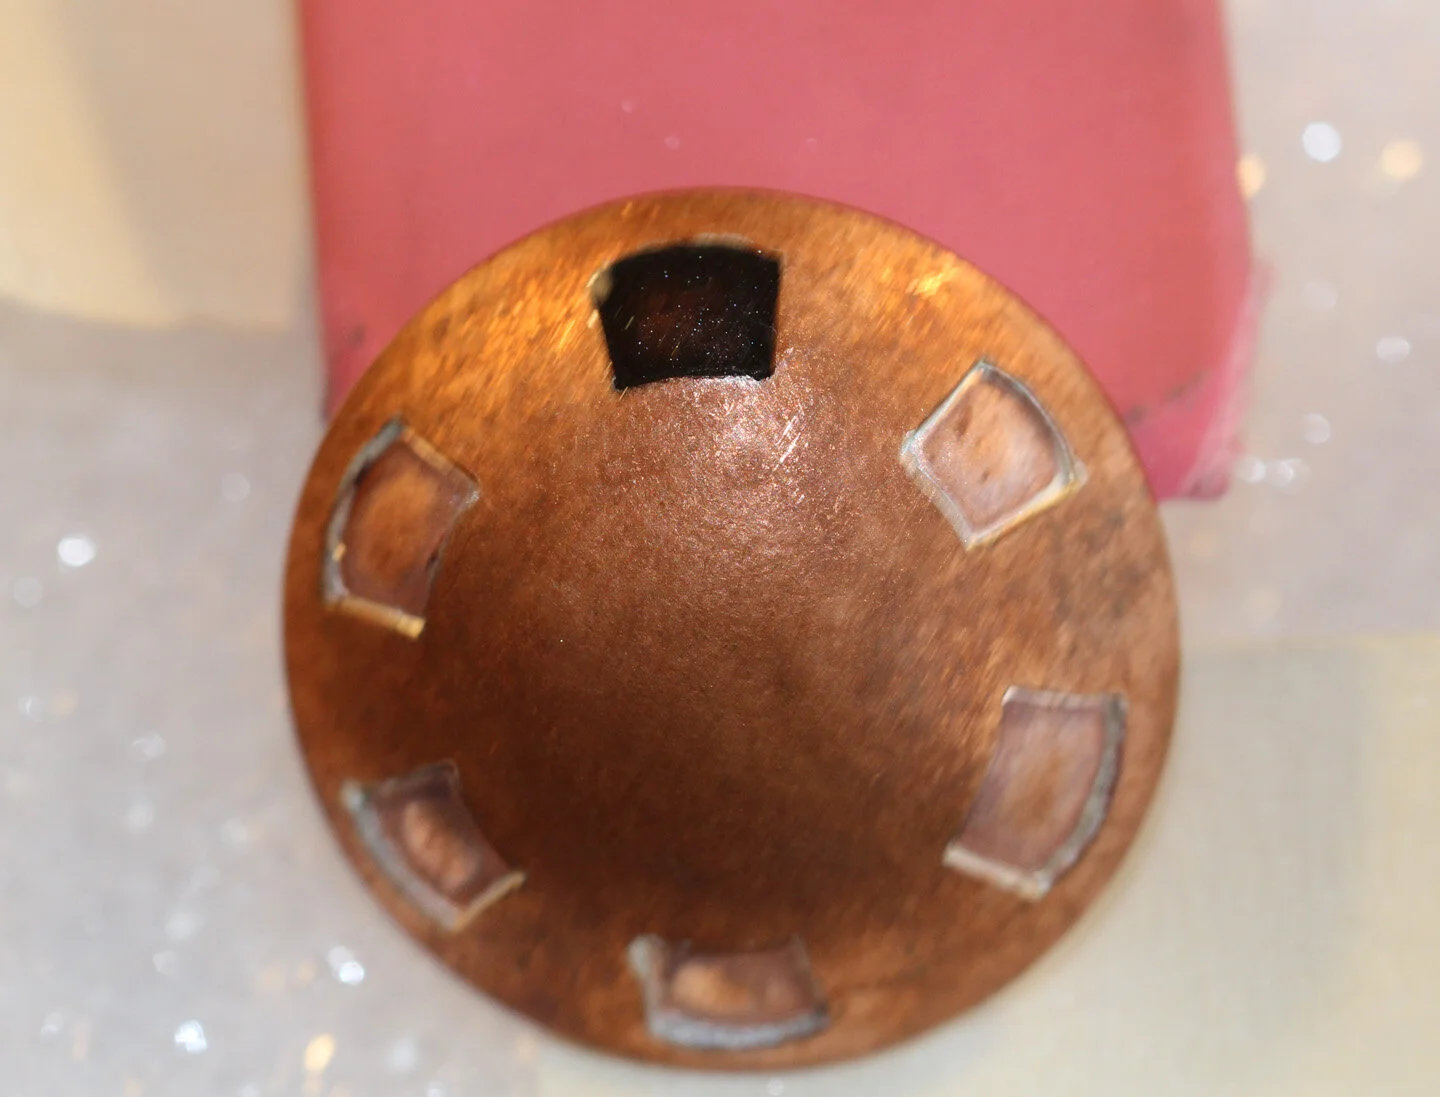
I apologize for the lousy photograph; if you look closely, though, you can see that the copper does come through the black epoxy resin. I had some thinking to do. Here’s what the earrings looked like prior to the inlaying.

I decided to sand the six openings with very fine sandpaper (600 grit), mainly to dull the metal. Then I blackened each opening with liver of sulphur, something we silversmiths use to blacken silver. I had another problem to solve. The epoxy, even though it’s really thick, is still fluid and will move; so I had to figure out how to place and hold the earrings while each opening was filled and then allowed to dry (24 hours). If I did nothing to hold the earrings “straight,” the epoxy would move and not be level within the openings. That was not an outcome that I desired. In a stroke, I decided that styrofoam blocks would do the trick. It would take me six days to fill the openings as I filled each component one-at-a-time. See the photo below.

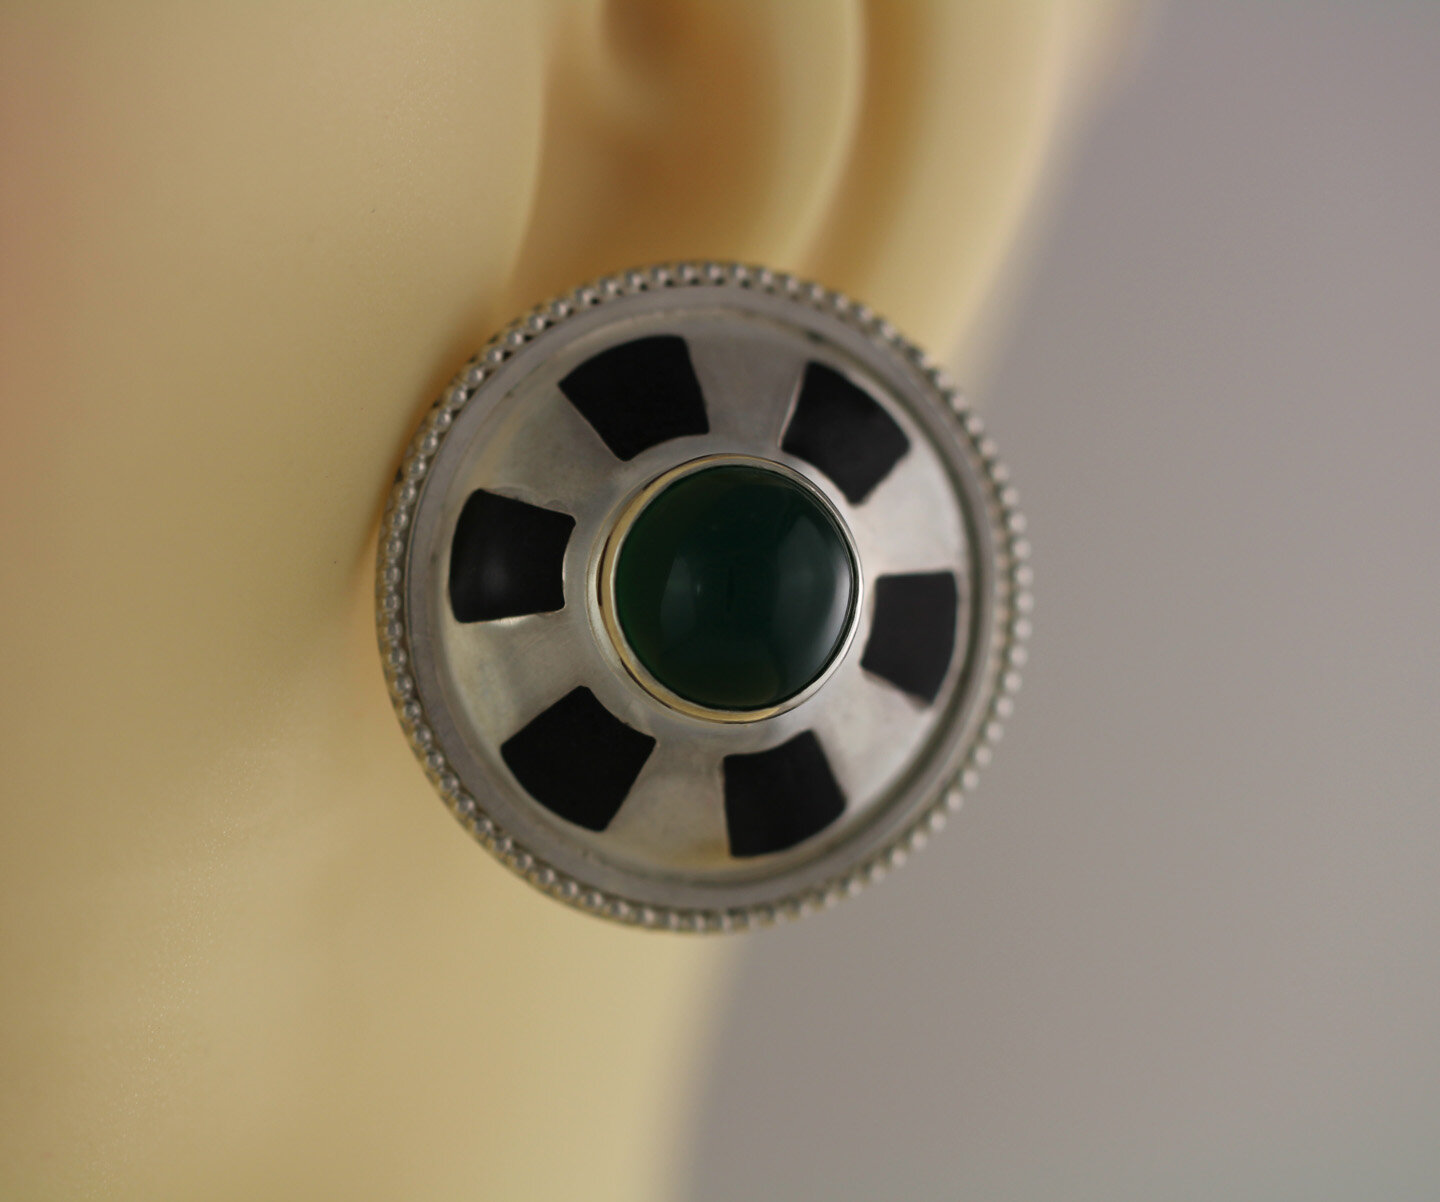
After all the openings are filled and dried, I final polish the earrings. I adjust the Omega clips so that they will be comfortable on my ears, however, for the person who owns them, that person will either have a fitting that I’ll do or go to a jewelry store for that. It is simple to move the Omega clips just a bit to maximize the comfort of wearing them. This is a long process; I hope everything I’ve written here has been understandable. If you have any questions, do email me. And finally, here’s Greer on one of my trusty mannequins.