Susan's Necklace
Susan found me at the Rittenhouse Square Fine Craft show this past October. She said that she had an amethyst stone and beads and rose quartz beads that a dear friend had given her, encouraging her to find someone to make a necklace for her. I answered that I’d be most happy to oblige.
So, Susan came to my studio with her treasures, and we talked about the necklace that she wanted. I took notes, as is my custom when meeting with a client, and recorded her desires. From the outset, I envisioned using the amethyst stone as a station on one side of the necklace. In the jewelry world, we call a decorative element in a beaded necklace a station, and Susan’s station would prove to be very special.
After Susan left, I made the bezel setting for the amethyst. The setting required an inner seat because the stone is faceted; faceted stones will not sit straight unless there is an inner seat underneath the girdle. Once the bezel was finished, I could begin to sketch my ideas.
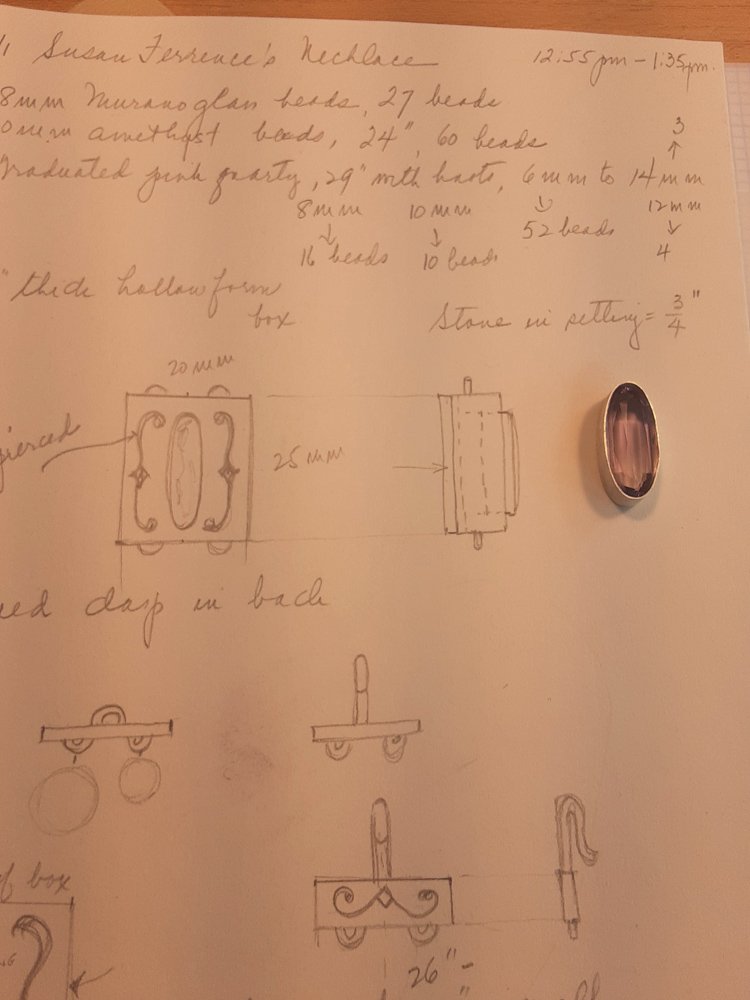
I already knew the station would be a hollow form because of the depth of the stone; it also occurred to me that I would have to access the back of the stone in case the stone did not sit correctly. A faceted stone has a tendency to roll, so to speak, in a bezel setting, and I would need to pop the stone out of the bezel if it were laying in crookedly (which, of course, happened). So how was I going to get access to the back of the stone if the hollow form was soldered closed? Then, it struck me — I would make the station a box. In the sketch, too, you can see my ideas for the clasp in the back.
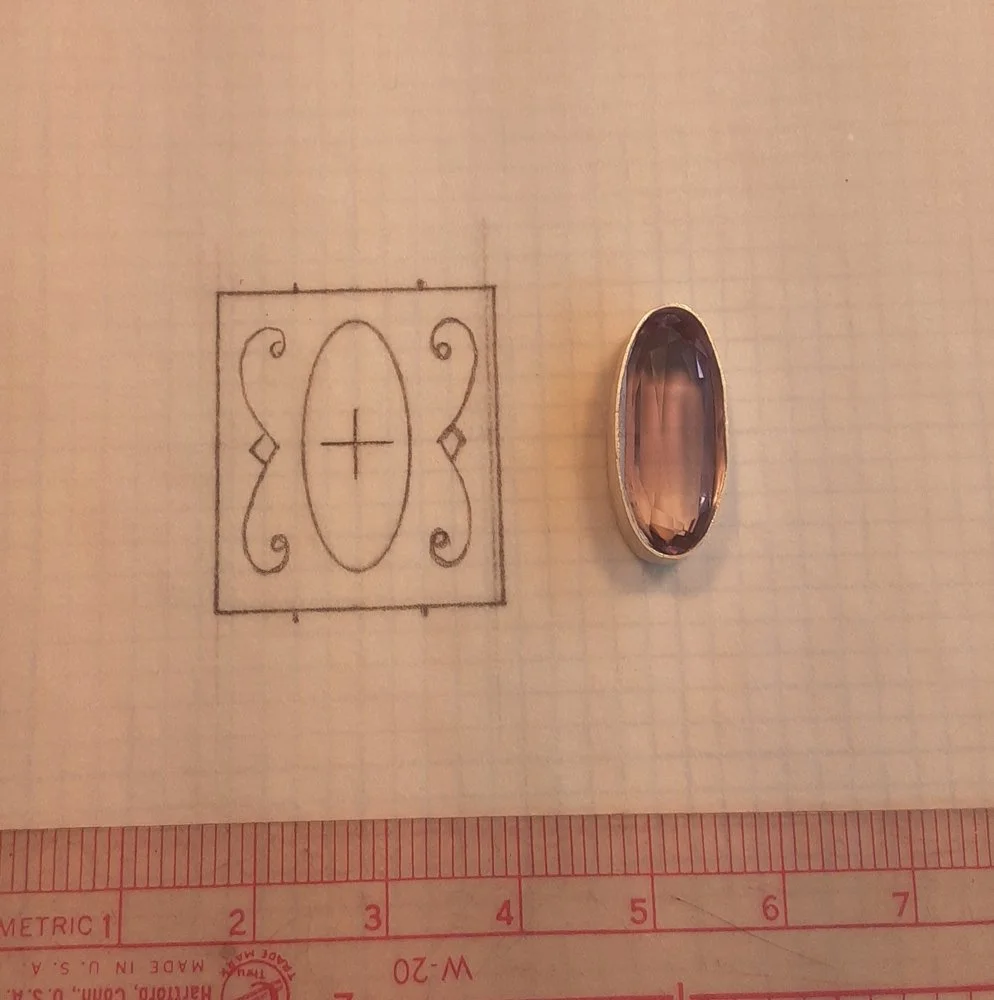
Once Susan okayed my design idea, I drafted the pattern for the front of the station/box. I need an exact drawing (which I call a draft), so that I can cut out the design in the metal as you see in the above image. When I cut out the oval for the bezel, I make the cut-out smaller than I need so that I can file down the metal so the bezel will fit without any gaps. Silver solder will not fill gaps.
The next step is the soldering of the bezel to the front of the station. Then I experimented with some copper to ascertain the height of the box. I made a square box-to-be from copper sheet and then cut this piece in half. See below.

Once I had this prototype pieces, I could see that this box would be too high, and only one of these halves was suitable. I set this prototype aside and formed a square box frame from silver sheet. Once I had this frame completed, I soldered it to the back of the front of the station. Below is a picture of this step just before I applied the flame of the soldering torch to the piece.
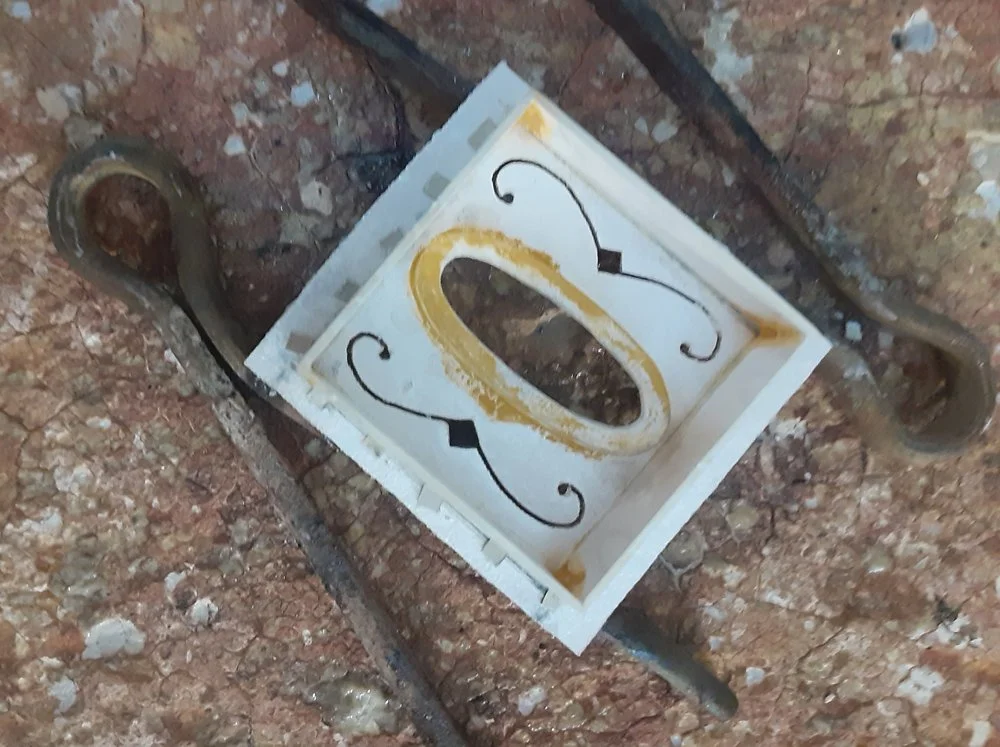
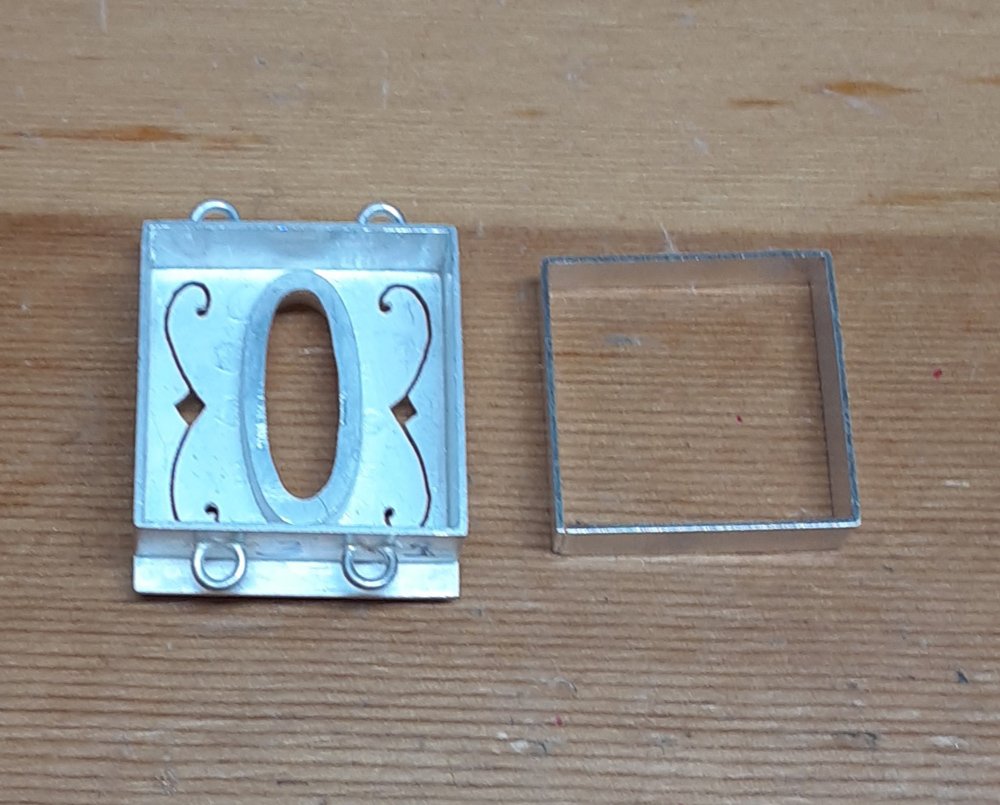
In the image above, I will point out several things with regard to my process. There are two cotter pins upon which the piece of resting — this is to facilitate heating the entire piece such that I can get the flame under the piece. Silver soldering demands that the entire piece be heated unlike the soldering done with a soldering iron. Also note the tiny square pieces around the square frame. These are called paillons from the French, and they are pieces of solder that will melt and permanently join the frame to the piece underneath it. Also note the yellow around the bezel and in the corners of the frame. This is yellow ochre, actually a glaze from the pottery world, which I use to prevent previously soldered joins from “unsoldering.” Once the piece has successfully soldered (and this means I inspect the piece to ensure I don’t have any voids where the two pieces meet), I can clean up the piece. Next step is soldering small half circles to the frame of this piece so that I will have places where I can attach the ends of the beaded components. See the below image.

In the above image, you see what are called third hands. These are tweezers that hold a piece for soldering since we can’t use our hands. You see again the yellow ochre to prevent unsoldering of previously soldered areas. I will solder each half circle separately, and, of course, there’s always one problem child so I will have to solder one of them twice. After all of the half circles are soldered onto the frame, I will clean up this piece, removing any solder mess and filing the piece in my first attempt at removing fire scale. Fire scale is a term for the oxidation of the copper ions in sterling silver; these ions are below the surface and look like dark clouds in otherwise white silver. It can take one to two hours of sanding and polishing to remove fire scale fully even from a small piece like the front of this station.
The next step is the creation of the back of the box, and the first step for this piece is the frame for the back. This piece has to fit, like a glove, into the frame on the front of the box or the box will either not close or will not stay shut. Below is a picture of the top of the box and the frame for the bottom.
Next step the design for the top of the box’s bottom: Susan is really into ancient Minoan designs, and she gave me some samples. From them, I chose the simple flower design to cut out of the top of the box. Once this piercing was complete, I soldered the frame to the pierced piece. Below is a picture of this piece after soldering
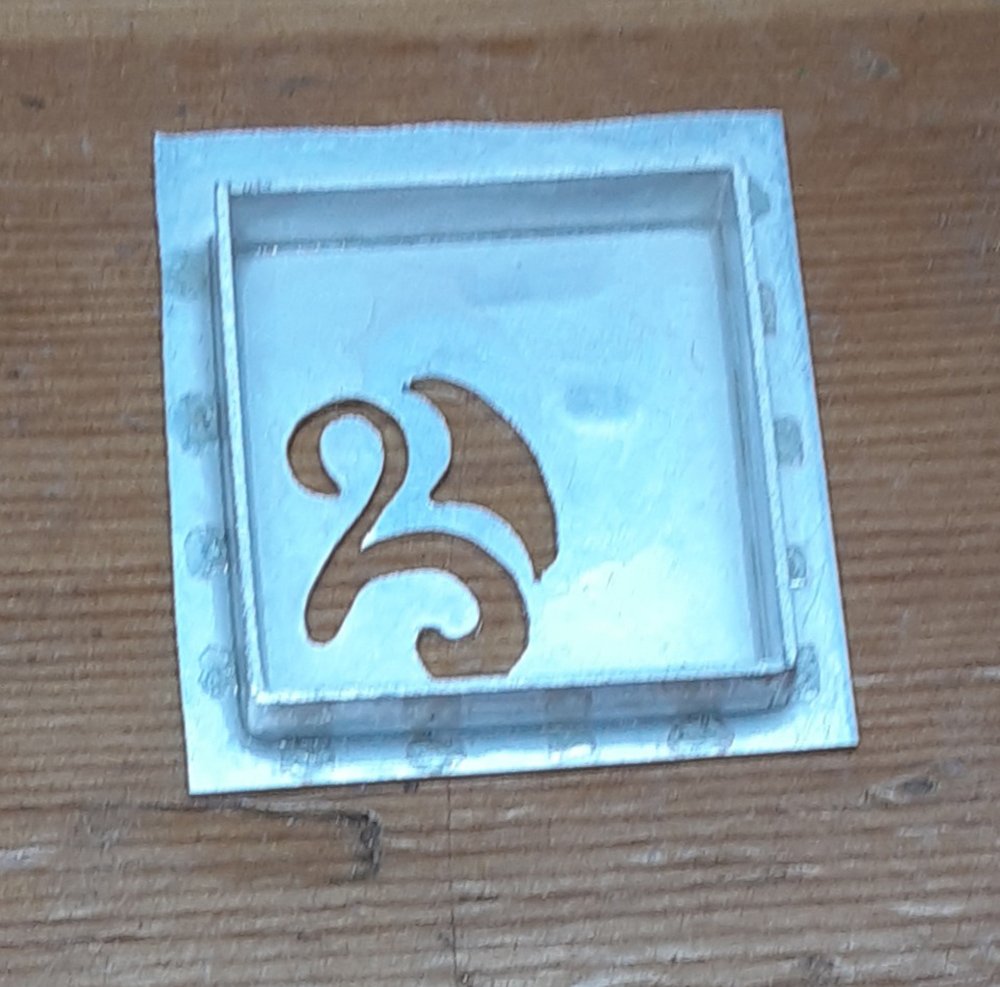
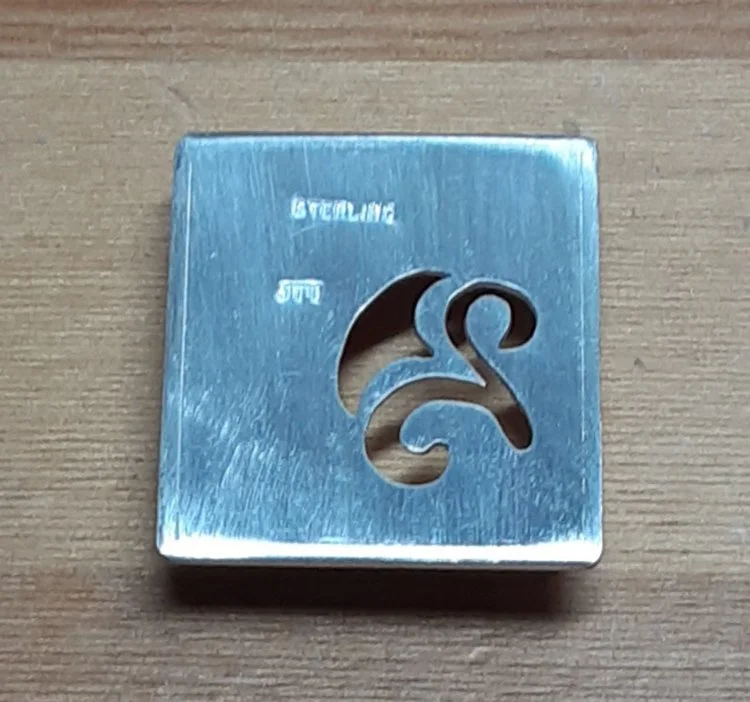
You can see the solder ghosts, as I call them, and I will sand them away — that’s what I mean by cleaning up the solder mess. I will also trim the selvage around the bottom so that it matches the top. Below is a picture of the back of the box after sanding it. You will see my two stamps: sterling and my logo.
Now that the station is nearly finished, I concentrate on the clasp for the necklace. I have decided that, instead of the single hook in my original sketch, I will have a double hook, thinking that this will be more stable and secure for the necklace. I did draft a pattern for the clasp, and since they are mirror images, I only needed one drafting. I cut out the pieces as I did for the front of the station and soldered on a back to these pieces. I did this extra step because I wanted these pieces to have a bit of heft. Then I needed to solder on the half circles and the hooks. Below is an image of this work-in-process.
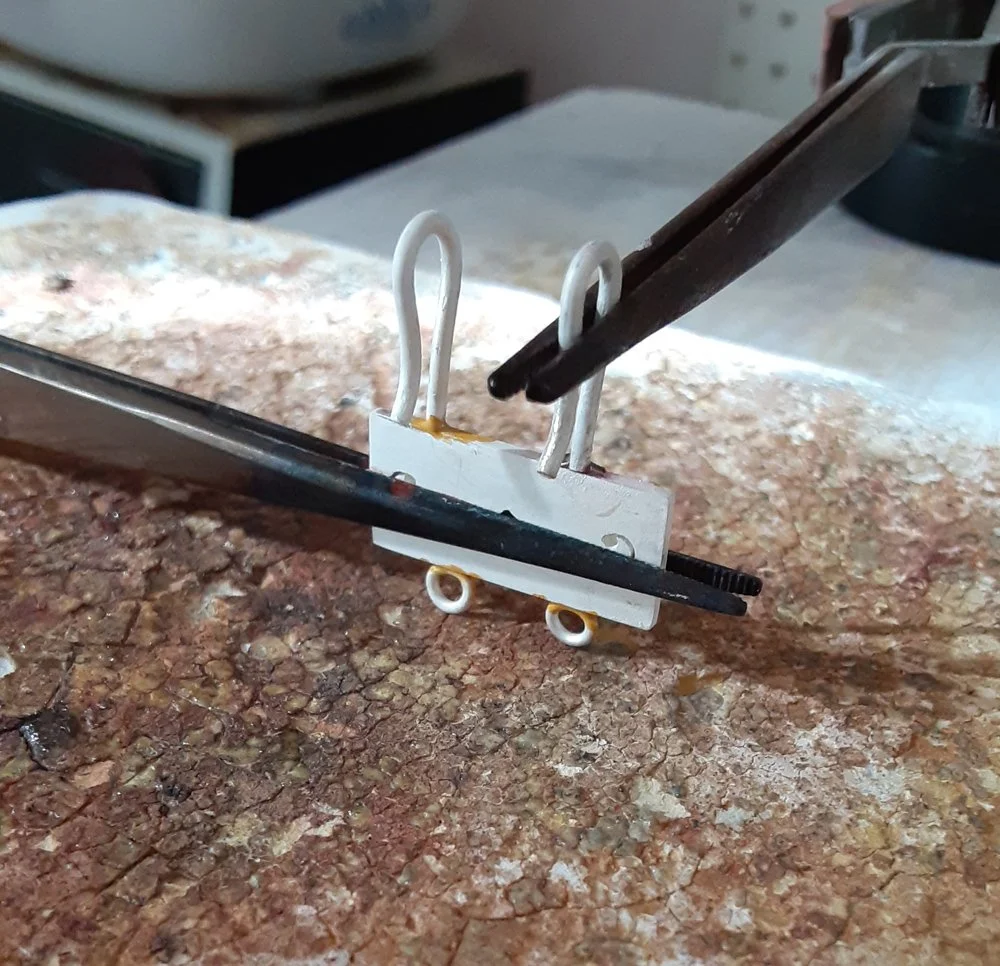
Just as for the other soldering operations, you see the third hands holding all the components, the yellow ochre used to prevent un-soldering of other components, and the solder paillons. Once this piece is soldered and pickled, I will inspect it and clean up the solder mess. Then I’ll move on to the companion piece that makes up the clasp.
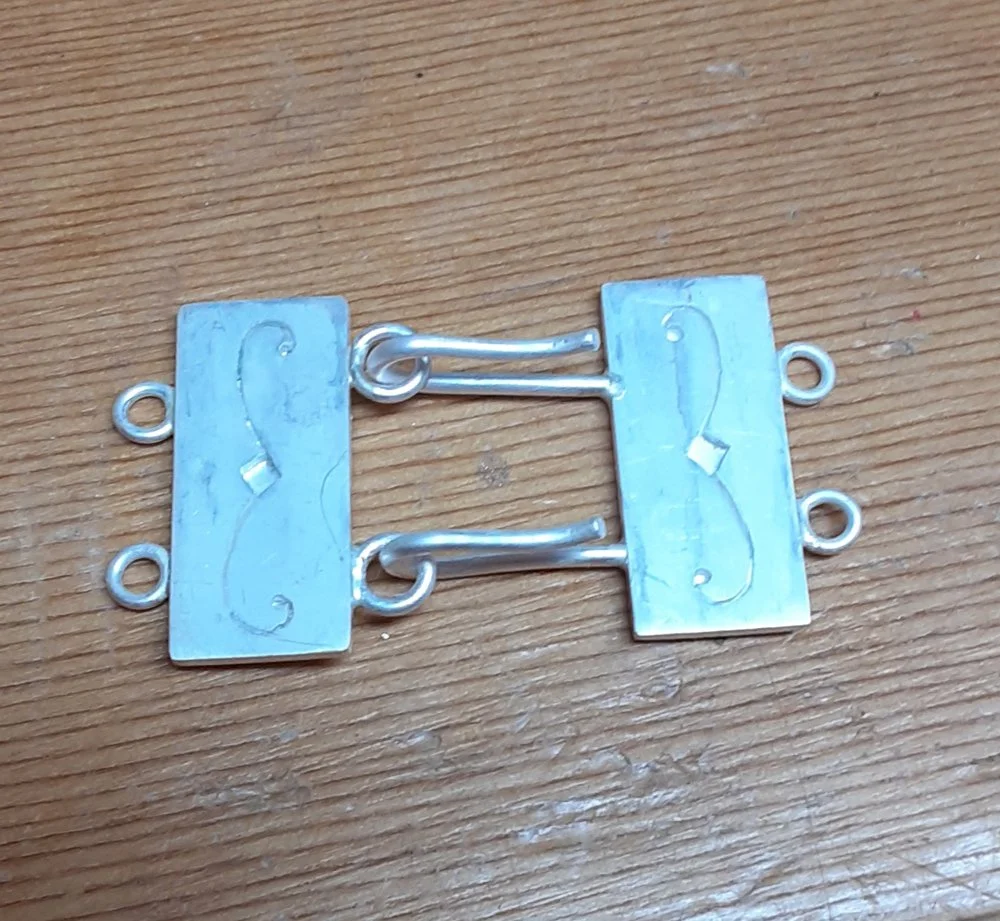
The above picture shows the clasp right after both pieces were pickled. At this point, I’ll sand all the surfaces, and, especially, the end of the hooks (to make them “soft” so they don’t hurt). And I’ll tumble them (n a rock tumbler) so that they will be bright and have a burnished finish. After final polishing, I moved on to the stringing process.
I laid out all the beads on a bead board after doing some calculations as to how the beads would “interact.” I imagined the amethyst beads on the outside with the pearls and rose quartz beads nesting on the inside. I string with silk, and I have quite a collection of colors. Below is a picture of the work-in-process.
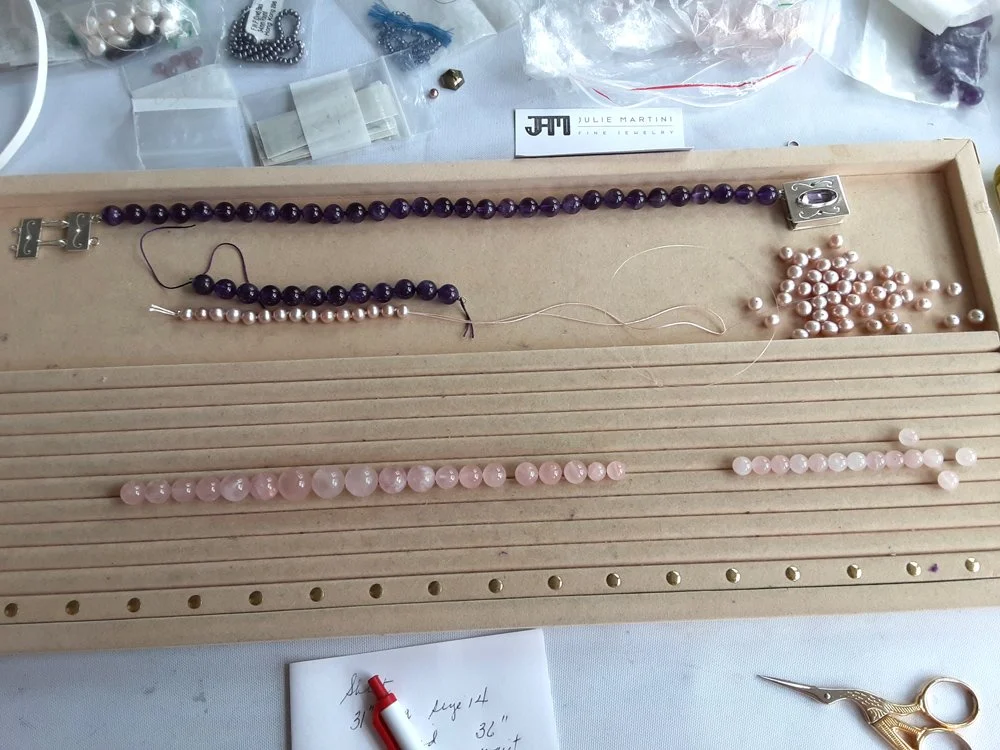
In the picture above, I’ve strung one of the amethyst strands and attached it to the station and the clasp. I have the second amethyst strand ready to go, but before I attach it to the station and the clasp, I am stringing the pearls. I have a mannequin that I use to help me with the exact stringing of these beaded strands because one strand has to nest into the other. I am sorry I don’t have a picture so you can see what I mean. However, I got the beads to behave and nest well, and then the whole necklace was finished. Susan came to receive the necklace, and I got her permission to photograph her with it.

I am always gratified when a client loves the piece of jewelry I’ve made for them. Susan is thrilled, and so am I. The necklace turned out exactly the way I envisioned it for her, and that’s always something I aim for.