Suzanne's Necklace
My friend, Suzanne, came to me with the blue stone you see below; it has great value for her, and she wanted a necklace that she could wear every day. Suzanne did not know what kind of stone it is; when I had the lapidary test it, the stone proved to be glass. That was no matter since she loved the stone. I thought it would make a wonderful necklace.
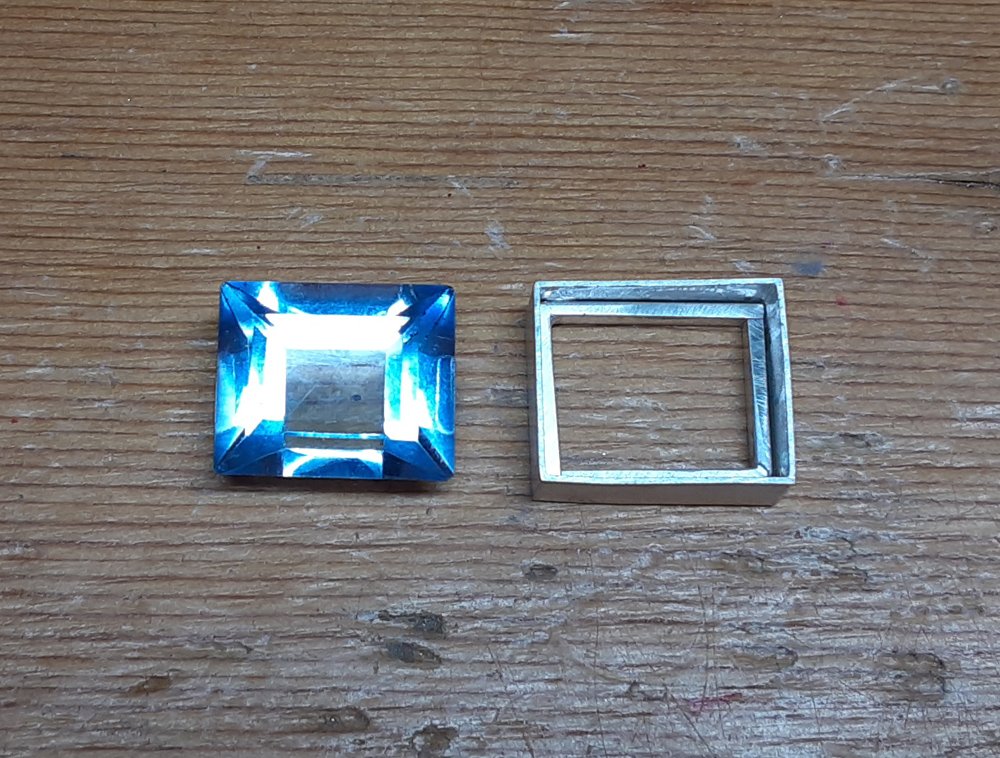
If you’ve read my other blogs, you’ll recall that, even before I start sketching, I make the setting for the stone. After consulting with Suzanne, we decided that I would set the stone upside down. As the stone is rather deep, I was concerned that the stone, right side up, would not remain in an upright position. But set downward would alleviate the problem. I also had an idea on how to make the stone really pop. The setting also required a seat so that the stone would sit level in the bezel setting.
I lent Suzanne several books on jewelry and jewelry design so that she could let me know what really appealed to her in terms of decorative elements around the stone. Suzanne really likes spirals, so I set about designing some spirals around the stone.

This was one of the sketches I made, and Suzanne reviewed them with me. She really liked my idea of an asymmetrical design but wanted the spirals to be tighter. I then decided to create spirals from copper wire and then we could have some fun moving them around the stone. Here’s one of the fun ideas that came up.

Suzanne came over to my studio, and she moved the spirals around and then we finalized the design. I then created spirals out of sterling silver wire and fit them to the stone. Here’s a picture of the piece after soldering the spirals.

The picture above is the piece right after it has been pickled, that is, after soldering, the piece spends time in a mild acid bath to remove the oxides that form during the soldering process. Now I will inspect the piece, do any filing to remove forming marks, sand all the pieces in preparation for initial polishing. I polish the piece with tripoli, a first step polishing compound before setting the stone.

The above picture shows the piece after final polish. When I set the stone, I placed a piece of blue metallic paper underneath the stone to deepen the blue. Suzanne helped me with the selection of the paper. Jewelers throughout the ages have used paper underneath stones in order to enhance their color. The next step was the creation of the chain for the necklace.
In thinking about the chain, I felt that a fine silver chain embellished with a few decorative elements would be suitable. Suzanne wanted less fuss, and so that left the two ideas below.

I sent Suzanne the above picture with the choice of faceted blue topaz rondelles or the small grey freshwater pearls either of which would be interspersed on the chain. Suzanne chose the pearls, and I wired up the necklace. Voila.
